

Hello learners,
I'm back with Part 2 of the current Series.
First of all, my sincere thanks and gratitude to Shubham bhaiyaa (TrainwithShubham) for releasing this series. I'm going to document the process for you guys.
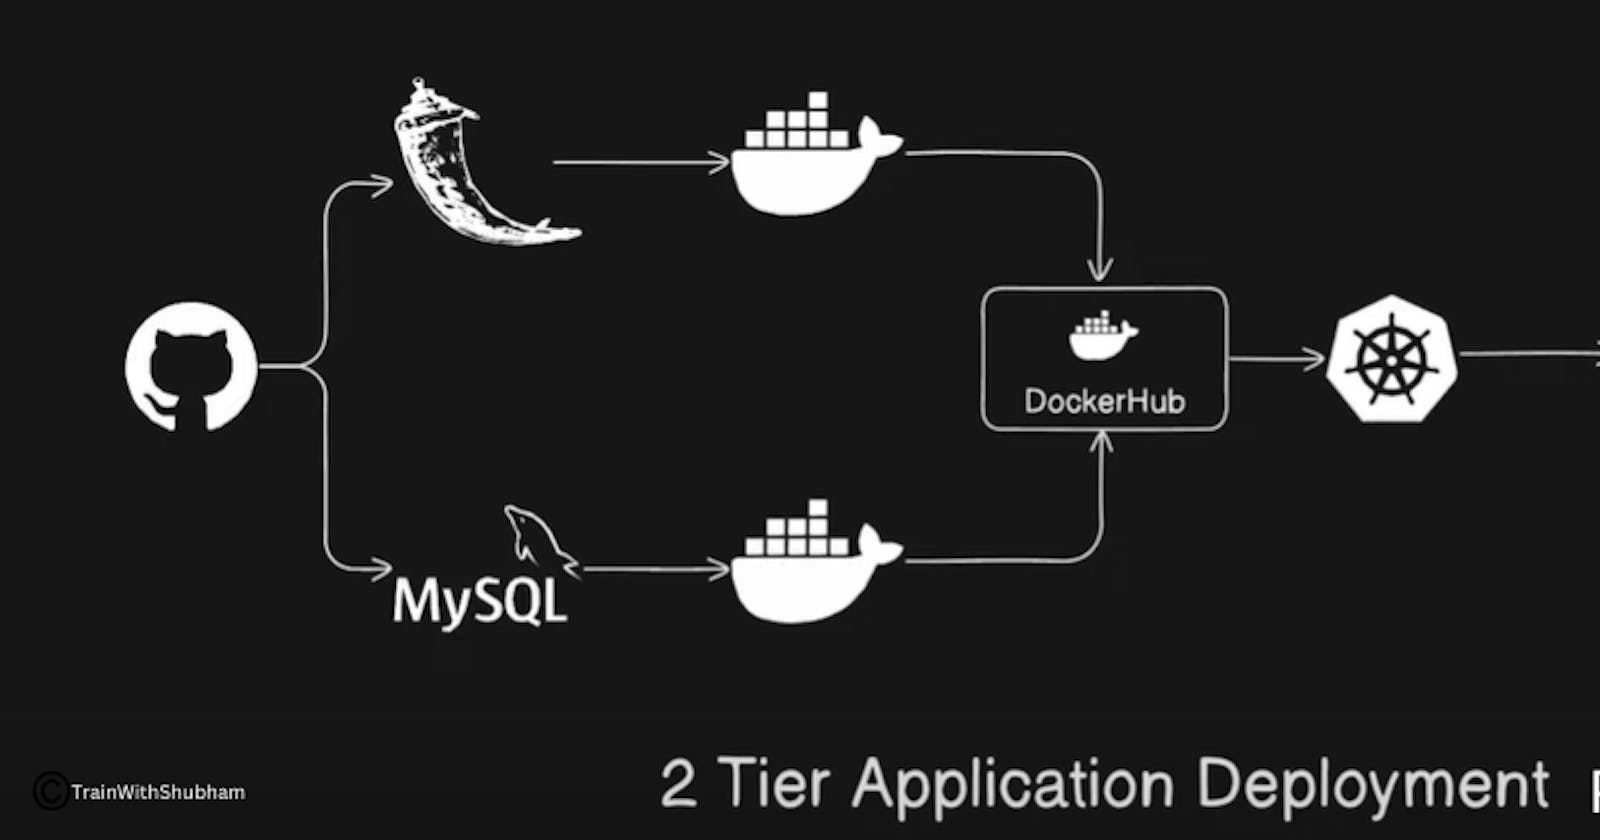
Overview:
In this Part, we are going to create Dockerfile for our application and database and push the image to Dockerhub. For this, first of all, we need a server.
This project we will be doing on AWS Cloud, so let's create an EC2 instance.
Step 1: Create an EC2 instance and Install Docker
I hope as you all have come a long way, you already know how to create an EC2. If you don't know, just explore. It's very easy.
Here is our EC2 of t2.micro and running Ubuntu OS.
Make sure, HTTP, HTTPS, and other required ports are open in the security group.

We will install docker here.
sudo apt-get update
sudo apt-get install docker.io -y
sudo apt-get install docker-compose -y
Now give permission to current user for docker service so that we can run docker command without sudo.
sudo chown $USER /var/run/docker.sock
Step -2: Clone Source Code
Now it's time to clone our code here, and then move to the project directory.
git clone https://github.com/sitchatt/two-tier-flask-app.git
cd two-tier-flask-app/
Please Note, that if you now do "ls" command here, you may see Dockerfile already present. The best way to learn is to delete the Dockerfile with "rm Dockerfile" command and write on your own.
Step 3: Creating a Docker network
Now, We need something that can help to create a bridge between the app container and the db container so that can be connected. Here Docker Network comes into the picture.
Let's create a Docker Network.
docker network create twotierapp
Step 4: Building Containers
Now, that we have the Dockerfile, let's build an image from there and eventually create a container. Also as we have a DB to connect, we need to add the app container to the network and also we need to pass few environment variables.
docker build -t flaskapp:latest .
docker run -d -p 5000:5000 --network=twotierapp -e MYSQL_HOST=mysql -e MYSQL_USER=root -e MYSQL_PASSWORD=admin -e MYSQL_DB=mydb --name=flaskapp flaskapp:latest
Create the mysql container now.
docker run -d --name mysql --network=twotierapp -e MYSQL_DATABASE=mydb -e MYSQL_ROOT_PASSWORD="admin" -p 3306:3306 mysql:5.7
Explanation: This command will run the docker container in detach mode. 3306 is the port where MySQL runs by default. For any DB, we need to provide some environment variable. Here we need to provide the ROOT password in advance to perform the operation later on. Lastly, we need to specify which MySQL version we will be using here. So we are using MySQL 5.7 here.
Now if you run "docker ps" command, you can see the containers are running.

Now, if you will check, our application is up and running in port 5000.
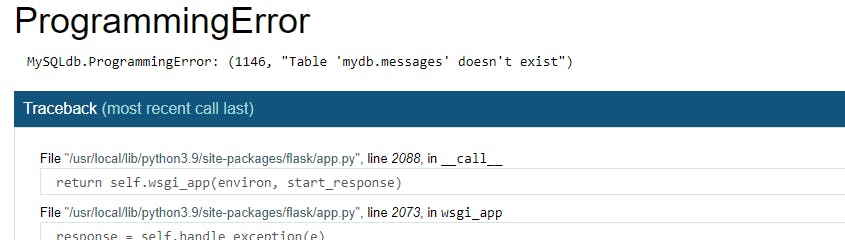
Oh!!! We got an Error !!! 😬

Wait! Don't Quit! As a DevOps Engineer, you need to understand the error and look for the solution. The best way to do it, is to read the error message itself. Here is the error message showing that we need a MySQL table to store the data, which eventually may resolve this error.
Let's try it Out!
Step 5 : Creating MySql Table
For that, we need to log in inside the MySQL container and create a table there.
Run this command and login to your container.
docker exec -it <your container id> bash
Now after logging in to the container, switch to root and run the below command to create a table.
mysql -u root -p
Now we need to use the mydb database to create a table.
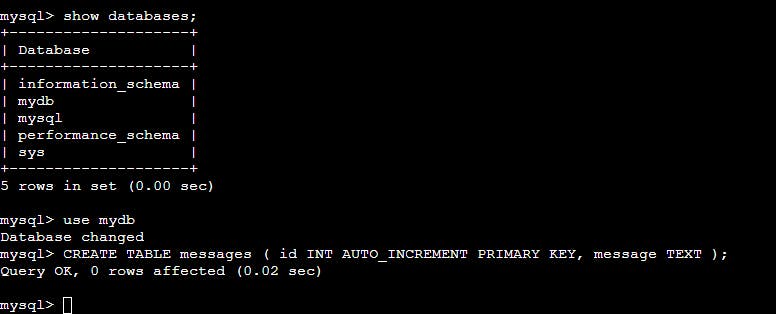
show databases;
use mydb;
CREATE TABLE messages ( id INT AUTO_INCREMENT PRIMARY KEY, message TEXT );
Snippet for reference:
⚠️ Imp Note: please do check the database's exact name with the show databases command because there might be a change concerning capital and small letters. You might need to update your docker-compose file accordingly.
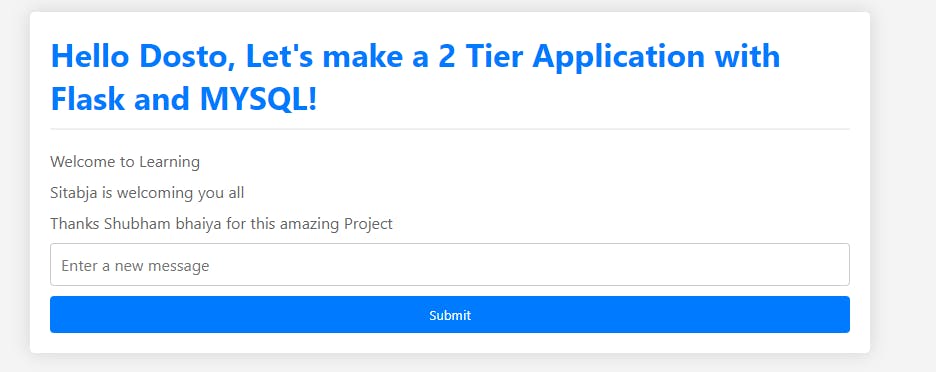
And now BOOM !! 🚀
We can see our application is running. Just test if it's working well and storing the data in the database.
- Writing is working in application:
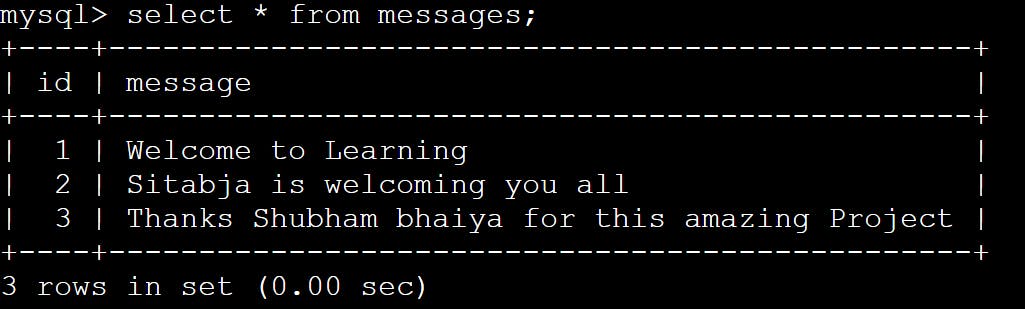
Input is being stored in MySql DB.
Exit from the container now.
In the Next blog, we will see how we can manage the containers via Docker-compose.
Stay Tuned!!!

💖 Thanks for being with me till the end. I hope that I provided you with some useful knowledge. Don't forget to spread the blog to your friends and community. 💖
Feel free to ask any questions, I'm just a DM away.👍